To package a guitar yourself, properly and in accordance with common carrier standards, you will need—
- A corrugated box, #275 weight with double closure flaps: see Guidelines for Guitar Shipping Boxes for more information on this.
- A 3/4″x48″ dowel to cram wads of crumpled old newspaper sheets, bubble pack or other loose packing material into the box to surround the guitar case.
- Old discarded newspaper to make hand-crumpled packing wads: two Sunday editions will be plenty. This is some of the best packaging space-filler material on earth…and it’s free.
- Packaging tape, available at a Walmart or an office supply store, cost ca $1-$7/roll. Make sure you get “Shipping Tape (Heavy Duty),” not “Packaging Tape” which is lighter weight. Duct tape, masking tape or ordinary desk tape should not be used; these do not have adequate strength or adhesion.
- Shipping labels, adhesive.
- A roll of 3/16″ bubble pack 12″ wide, available at Lowe’s, Home Depot, office supply stores, etc. The best buy I have found is at Walmart: 12″W x 150’L for $15, more than you will likely need to ship one guitar.
- A flashlight so you can look down into the box and see what you’re doing while filling the voids with packing material.
- A stool to stand on while loading and filling the box.
Here’s something you do NOT need—
- Foam “peanuts” for packaging the instrument. Foam peanuts are convenient and easy to use and work just fine for small packages. However, when shipping a large item like a guitar they are very messy to unpack because of their static electricity; they stick tenaciously to everything. In addition, a guitar case is more likely to shift around in a peanut-packed box.
Here’s how to do the packaging—
- Loosen all strings. This is especially crucial if very hot or very cold temperatures are expected along the shipping route; such conditions can cause a fully tensioned bridge to pull right off the guitar.
- Ship the instrument in a plush-lined hard-shell case only. If the instrument does not fit snugly in the case, use extra padding (pieces of bubble pack work well) so the instrument cannot shift around inside the case. Otherwise it may be damaged from a fall, even if there is no apparent damage to the case or the outer box. If the neck cradle in the case does not fit snugly to the neck and press the fingerboard firmly against the case lid, create some packing around the neck where it crosses the cradle. (Some people recommend wrapping the entire guitar in bubble pack before putting it in the case, but I do not recommend this: if there’s enough room in the case to accomodate such a full wrap, the case is likely a dubious candidate for other reasons as a container for shipping a guitar.)
- Print your name and address and the destination name and address with zip codes on a shipping label and put it on the case lid before packing before packing the case; pick a place where the surface is flat, e.g. over the neck. Secure the label with packing tape. This is to identify the sender and recipient in case the box is damaged and the sender/recipient information on the outside of the box is lost.
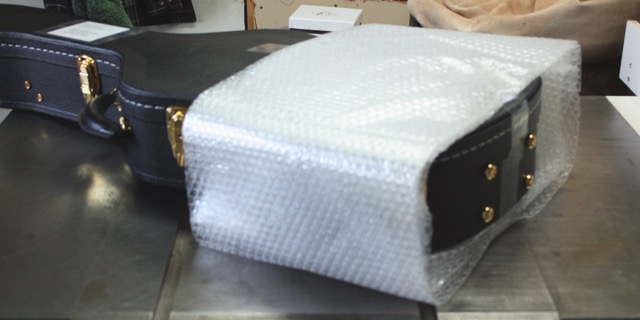
- Using the bubble pack, create a wrapped cushion around the lower bout of the case only. If the case has an arched lid and flat back (typical), add 2-3 additional layers of bubble wrap to the back of the case; this is to equalize the actual space between the guitar and the box for both the soundboard and back of the guitar. Add enough layers in this wrap so that the body area of the case will fit snugly—but without bulging the box—to the front and back of the box. How many layers of bubble-pack wrap you will need will depend on the case you’re using to ship. The cases I use to ship new guitars need 5 layers over the arched lid and 8 layers on the back. Don’t be concerned with voids at the sides; those can be filled after you’ve inserted the case into the box. Secure the bubble-pack wrap to the case with packaging tape. When you’re done with this step, it should look something like this—

- If the box has been used before and there are any small holes or minor damage, patch with with 2-3 layers of duct tape or packaging tape. However, I would recommend a new, unused box.
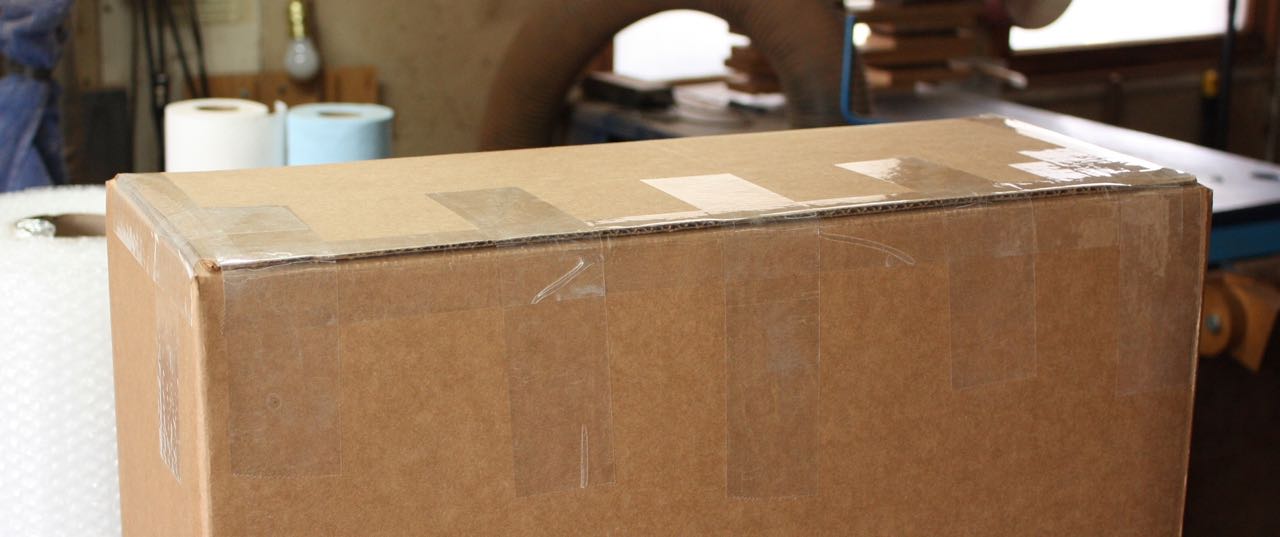
- Seal the lower-bout box flaps with strips of packing tape at least 1-1/2″ wide. Strips of tape running parallel to the flap edge may be used. However for the strongest seal, be sure to also apply 6-8″ lengths of tape placed perpendicular to the flap edge spaced about 2-3″ apart. When you’ve finished this step, it should look something like this—

- Turn the box around and stand it on the on the floor on the lower bout end for loading and packing.
- Print your name and address and the destination name and address with zip codes on a shipping label and put it on the front (lid-of-case side) of the box., top left corner. Use street addresses only; common-carrier shippers will not ship to post-office-box addresses. Seal this label with packaging tape. This is to identify the sender and destination in case the shipper label gets damaged.
- Drop a loose 6″-10″ layer of crumpled newspaper wads in the bottom of the box.
- Insert the case into the box with the box standing on the floor on the lower-bout end; push it lightly down into the layer of crumpled newspaper wads.
- Center the case in the box in all directions as much as possible. Fill the empty spaces in the box with crumpled newspaper (single sheets are best) so the case cannot shift around inside the box. Use the dowel as needed to cram wads of crumpled newspaper into the voids left by the case. The packing need not be tight, just enough to keep the case from shifting around during shipping.
- Seal the headstock-end flaps with strips of packing tape the same way as the lower-bout end.
- If the box has already been used, cross out any old words, numbers or bar codes on the box to avoid confusion about the sender or destination address.
- Print “THIS END UP” and ” STACK ON TOP ONLY” with a large black felt-tip pen on the front of the box at the neck end
- Print “FRAGILE” with a large (preferably red) felt-tip pen on the back and front of the box, or apply “FRAGILE” stickers.
